Update esp8266-vindriktning-particle-sensor-homekit.ino |
||
|---|---|---|
| img | ||
| .gitignore | ||
| LICENSE | ||
| README.md | ||
| SerialCom.h | ||
| Types.h | ||
| esp8266-vindriktning-particle-sensor-homekit.ino | ||
| my_accessory.c | ||
README.md
Apple HomeKit for IKEA VINDRIKTNING PM2.5 Air Quality sensor

ESP8266 firmware, for IKEA VINDRIKTNING PM2.5 Air Quality sensor.
The modification doesn't interfere with the normal operation of the device in any way. The ESP8266 just adds another data sink beside the colored LEDs.
This Firmware is Frankenstein Monster between MQTT ESP8266 IKEA VINDRIKTNING Firmware from Hypfer and ESP8266 HomeKit implementation from Mixiaoxiao. It's my first project in C for ESP8266, so don't expect any warranties. But it works on my device. I am not liable for any damage to your devices. If you use this firmware, it's your own risk.
Prerequisites
- An ESP8266 with a 5v voltage regulator (e.g. a Wemos D1 Mini)
- Some short cables
- A soldering iron
- A long PH0 Screwdriver
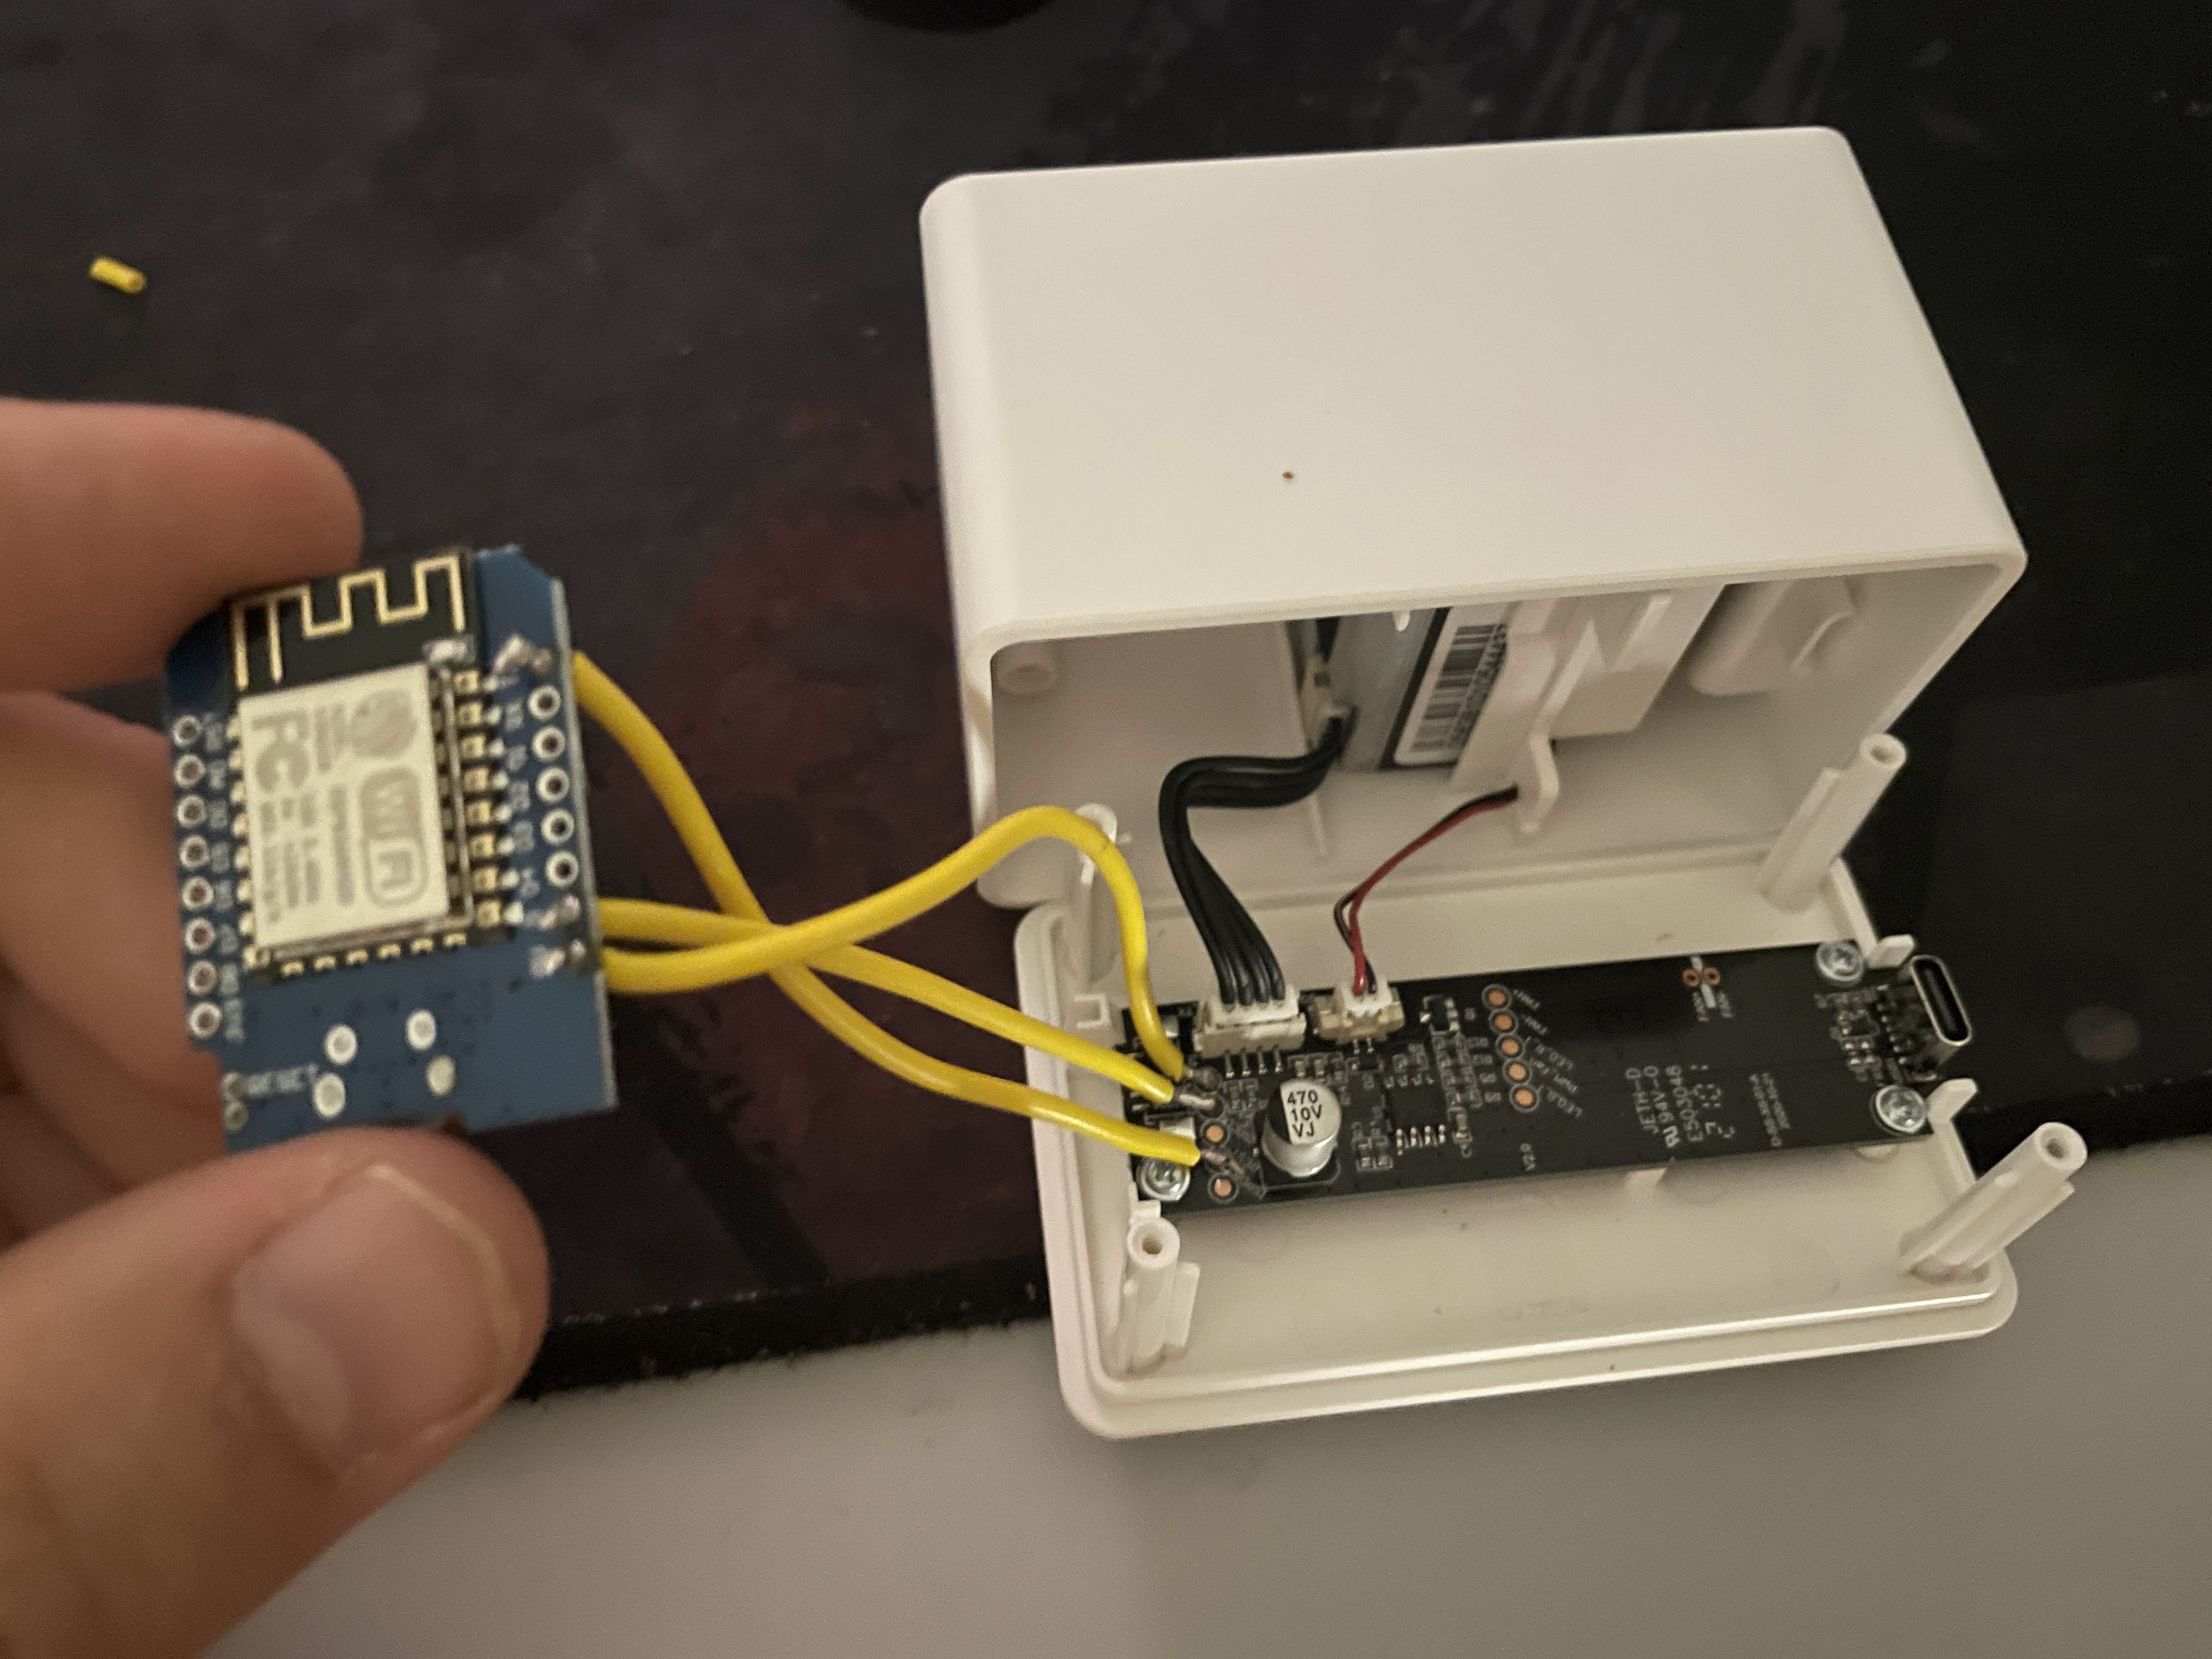
Fortunately, there is a lot of unused space in the enclosure, which is perfect for our ESP8266. Also, everything we need is accessible via easy to solder test points.
Hardware
To install the ESP8266, you need to unscrew the four visible screws in the back of the enclosure.
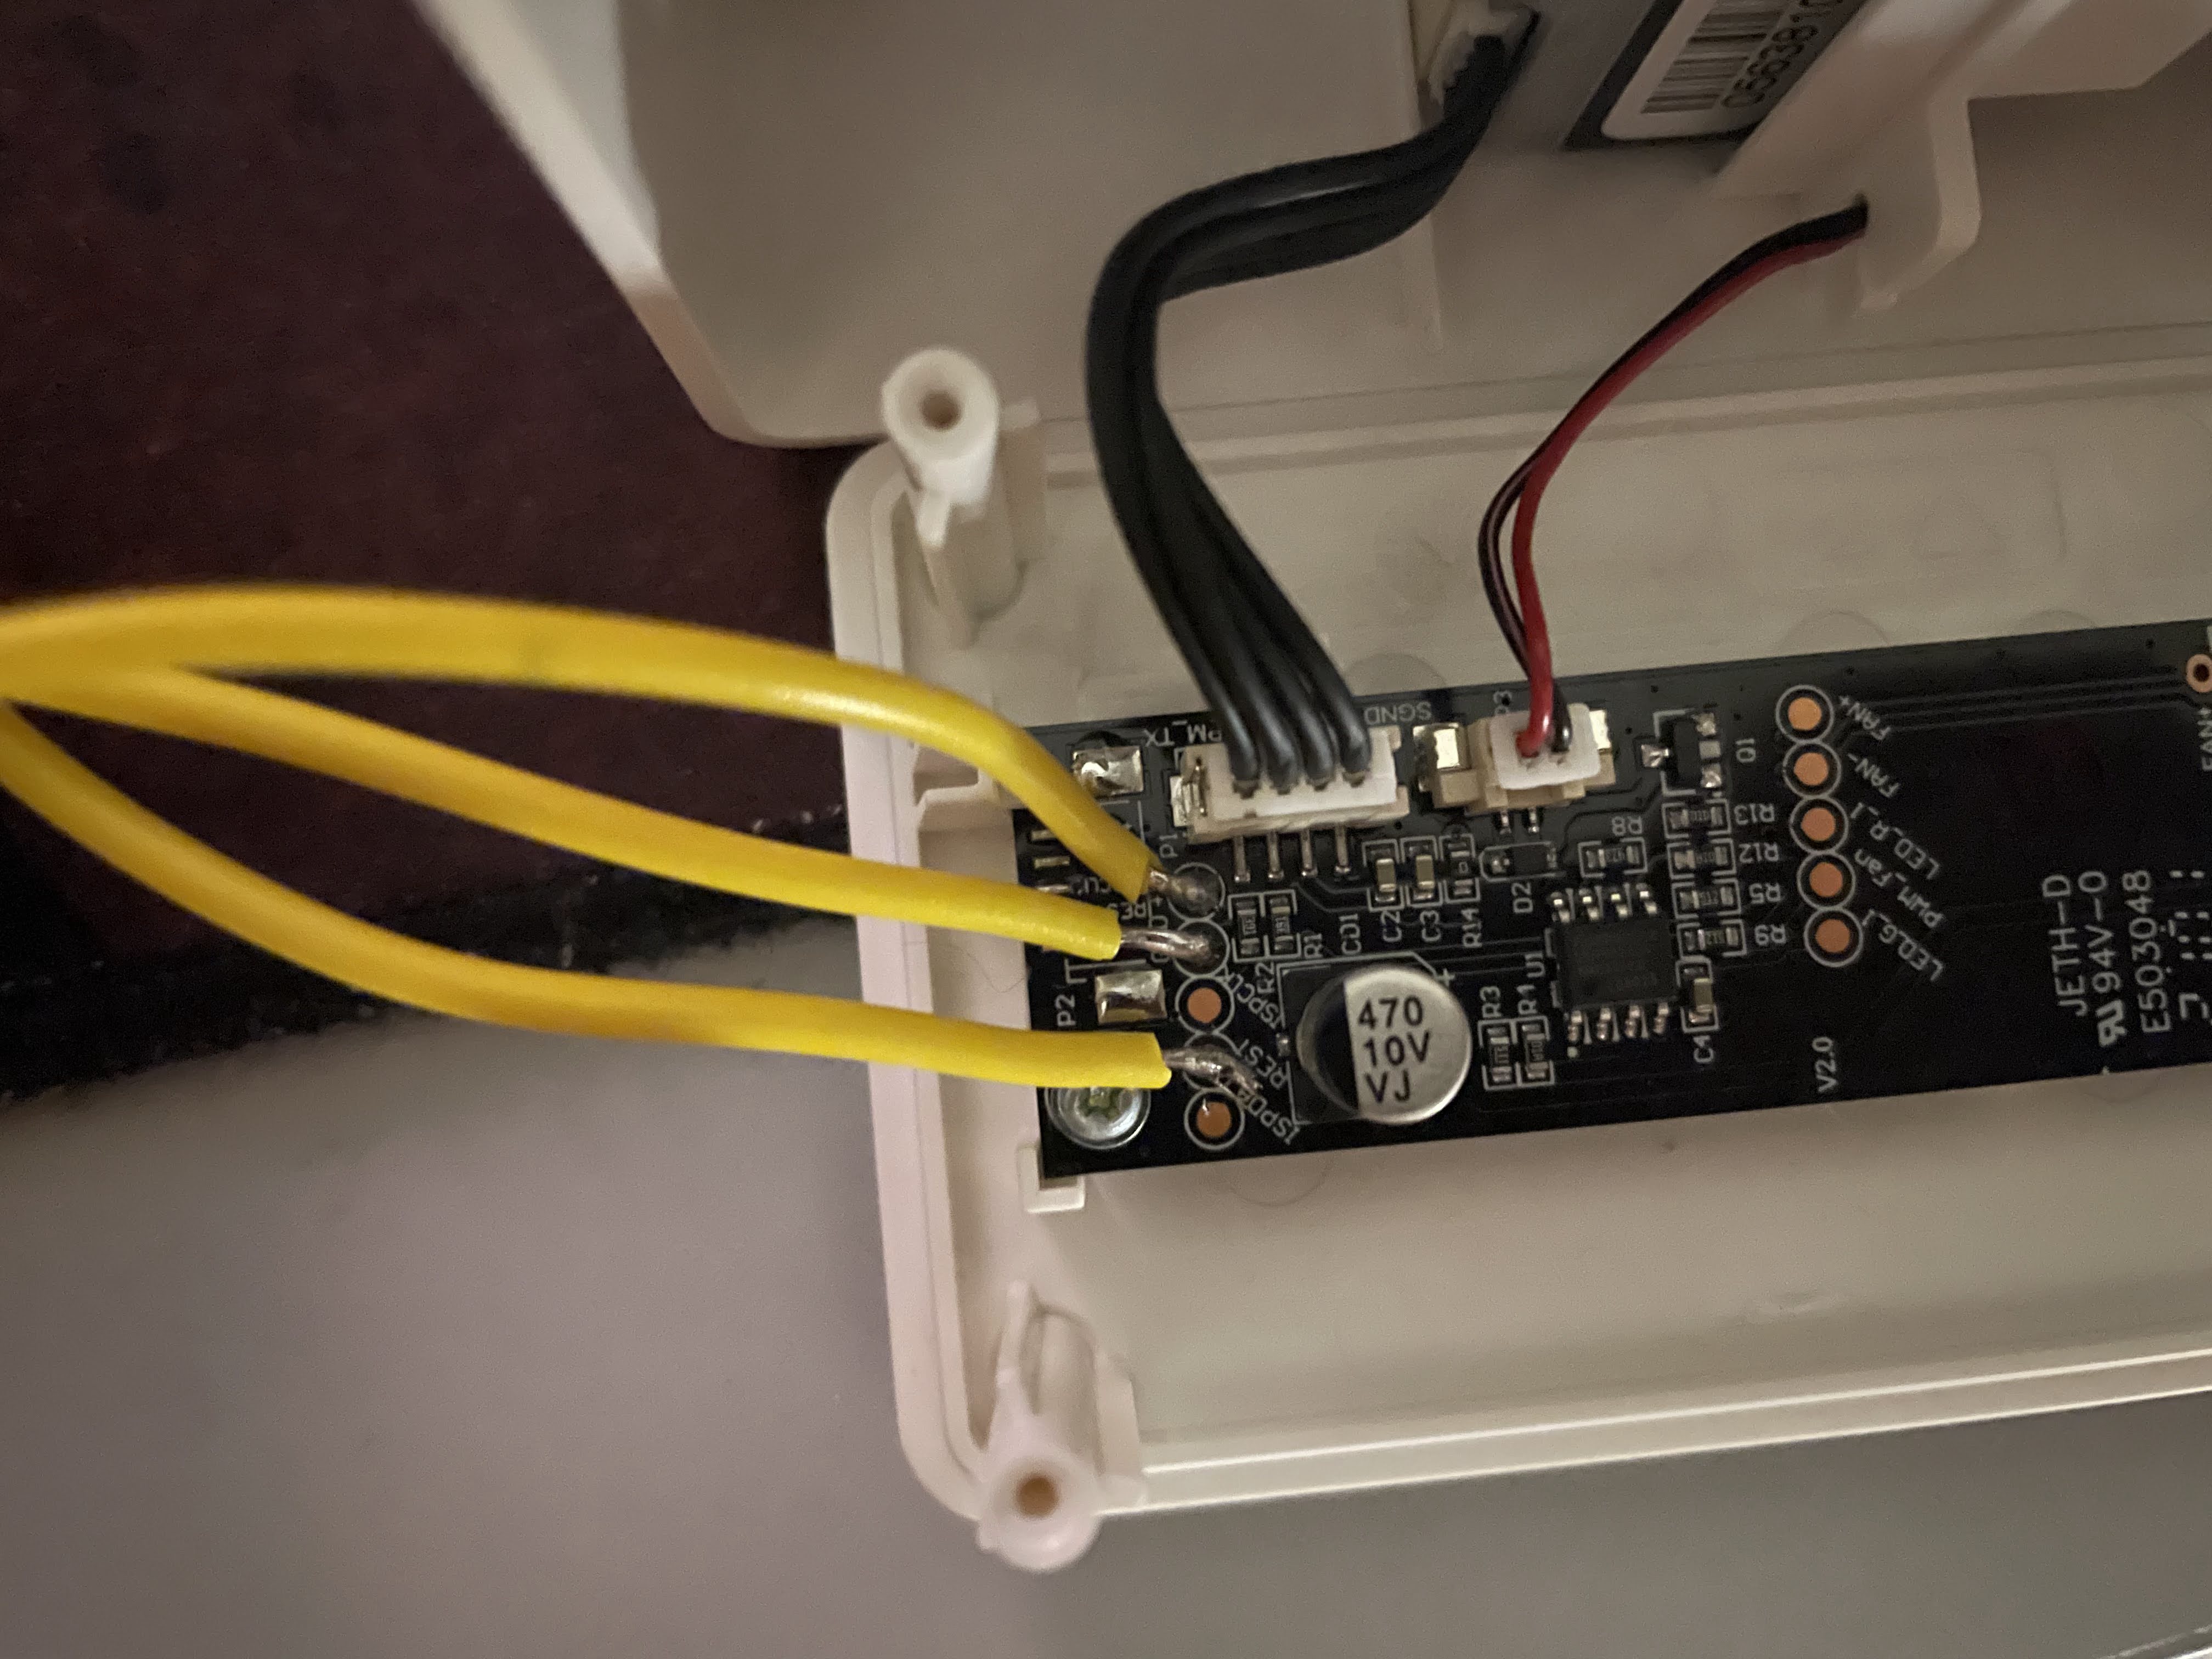
As you can see in this image, you'll need to solder wires to GND, 5V, and the Testpoint that is connected to TX of the Particle Sensor.
Then just connect these Wires to GND, VIN (5V), and D2 (if you're using a Wemos D1 Mini).
Done.
Software
The firmware can be built and flashed using the Arduino IDE.
For this, you will need to add ESP8266 support to it by using the Boards Manager.
Furthermore, you will also need to install the following libraries using the Library Manager:
- ArduinoOTA 1.0.3
- WiFiManager 0.15.0
- Go to this GitHub repo and download it as ZIP - https://github.com/Mixiaoxiao/Arduino-HomeKit-ESP8266
- In Arduino IDE select "Sketch" -> "Include Library" and "Add .ZIP Library..." and select downloaded ZIP
- Download and open this repository in Arduino IDE
- Set the ESP8266 CPU to run at 160MHz
- Build, flash, and you're done.
Connect to HomeKit
- Plug your Air Quality sensor to power (ESP8266 is powered through VINDRIKTNING)
- Go to WiFi Settings on your iPhone/iPad and connect to "VINDRIKTNING" WiFi
- Page is opened automatically where you select your Home network and make a connection
- Go to your Home app and select "Add Accessory"
- Now Scan code on top of this webpage, alternatively select "More Options" and you should see your Air Quality Sensor there (Password is 111-11-111).
ToDo
✅ Easier WiFi pairing process
✅ Reset function for WiFi
✅ OTA Updates
References and sources
- @Hypfer for MQTT ESP8266 VINDRIKTNING custom firmware GitHub link
- @Mixiaoxiao for ESP8266 HomeKit firmware GitHub link
- @haxfleisch for their teardown of the device.
- Gabriel Valky for the incredibly useful LA104 custom firmware + tools